

De zeemannen en bootjes blijven maar terug komen op mijn blog (obsessie? ;))...Dit keer een snel en makkelijk vilt boot tutorial. Je kunt het bootje als sleutelhanger gebruiken of er een broche van maken. Of het volgend kerst in de kerstboom hangen natuurlijk, maar daarvoor is het misschien nog een beetje vroeg...
//The sailor boys and boats keep returning on my blog (obsession? ;))...This time a quick and simple felt boat ornament tutorial. You could use the boat as a keychain or make a brooche out of it. OR you could use it as christmas tree ornament next christmas, but it might be a bit early for that...//

* een lapje vilt//a small cloth of felt
* borduurgaren // embroidery thread
*een schaar//scissors
*een naald//a needle
*een klein beetje vulwol//a bit of wool batting
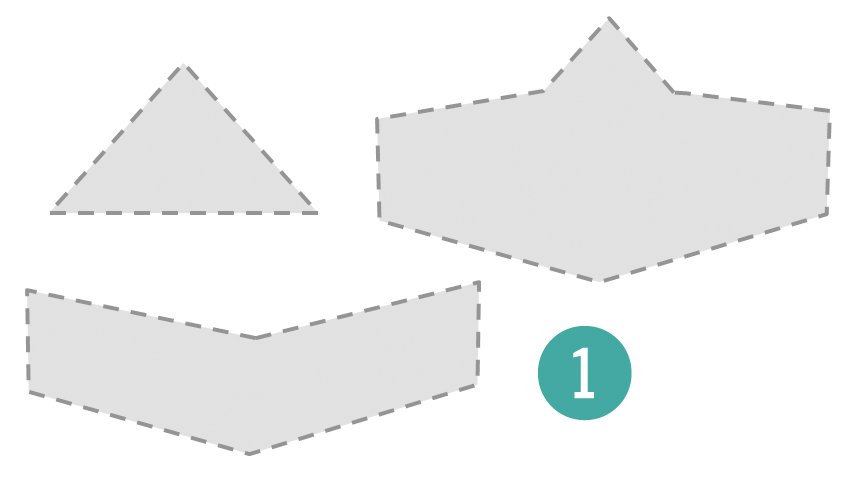


3. Plaats het driehoek op de achterkant van de boot en naai langs de rechter en linkerkant vast (zoals aangegeven met de gele lijnen). Stop nu een klein beetje vulwol onder de driehoek. //Place the triangle on the back piece of the boat en stitch down the right and left side (as indicated with the yellow lines). Now stuff the triangle with a little bit of wool batting.

4. Naai nu ook de voorkant van de boot op de rest vast. Naai daarvoor langs de rand van de voorkant (zoals aangegeven met de gele lijnen). Vul met een beetje vulwol, voordat je het helemaal dichtnaait. //Now also stitch the front piece of the boat onto the rest. Stitch along all sides, as indicated with the yellow lines. Don't forget to stuff it with a bit of wool batting before you stitch down the last side.
Photos & tutorial: ©Andrea Maassen

Leuk! mooie foto's ook! :)
BeantwoordenVerwijderenWat leuk zeg!
BeantwoordenVerwijderenWat schattig!
BeantwoordenVerwijderenZiet er leuk uit! Als ik vilt heb ga ik het meteen maken, leukleukleuk!
BeantwoordenVerwijderenleuk! ik ben benieuwd naar het resultaat :)
VerwijderenSuper leuk!!!!
BeantwoordenVerwijderenHeel lief!
BeantwoordenVerwijderenaah superleuk!
BeantwoordenVerwijderenvery cute!
BeantwoordenVerwijderenWat schattig! Vilt is zo'n mooie stof (is het een stof?).
BeantwoordenVerwijderen